Jim Dine Heart Art

Jim Dine Heart Art Read More »
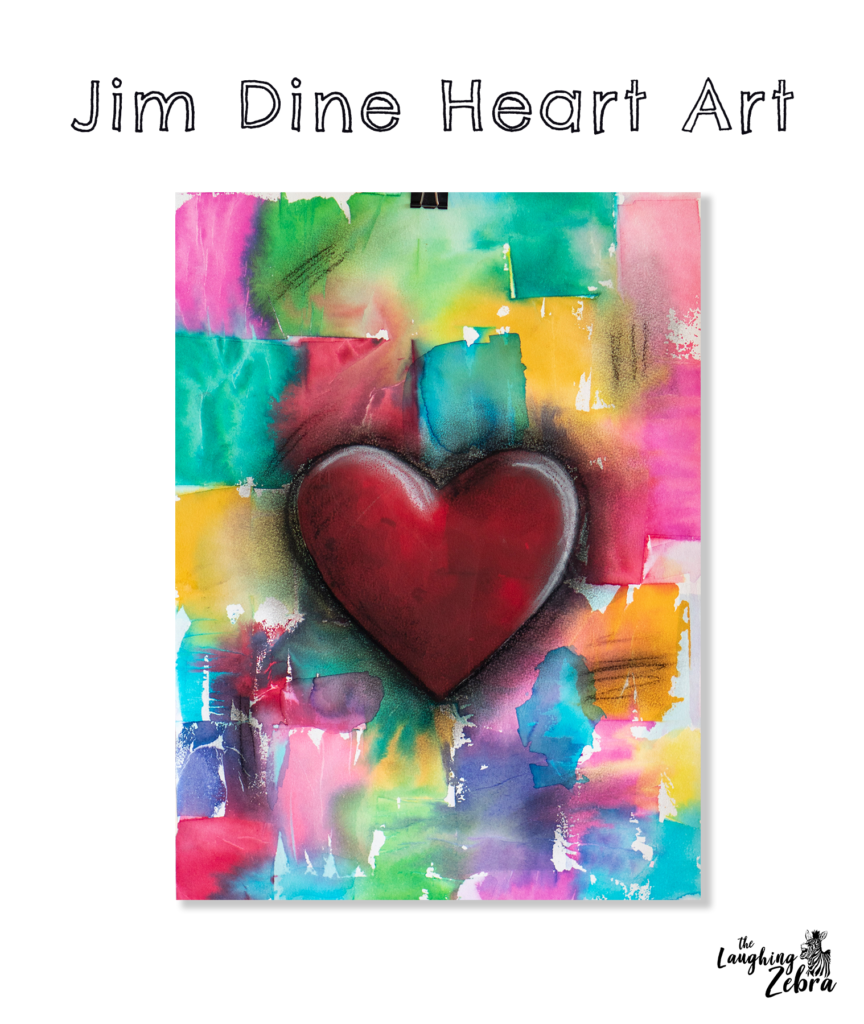
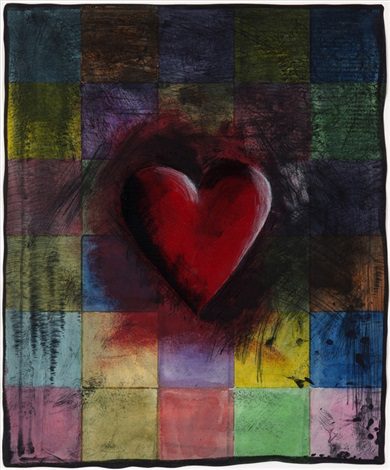
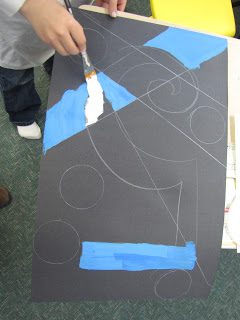
I love this print of Jim Dine’s titled The Handkerchief. I have done several Jim Dine projects over the years, but have never come across this particular print. I decided to experiment with some different art materials to see if I could create a lesson with a similar look and feel.
I have tried this with a preschool class and with K-6th grade students at one of the schools I teach at with great success!
*See my step by step instructions, supply list, and more photos in my upcoming book (click here for more information).
Please refer people back to this site if you use this lesson! 🙂
Jim Dine Heart Art Read More »
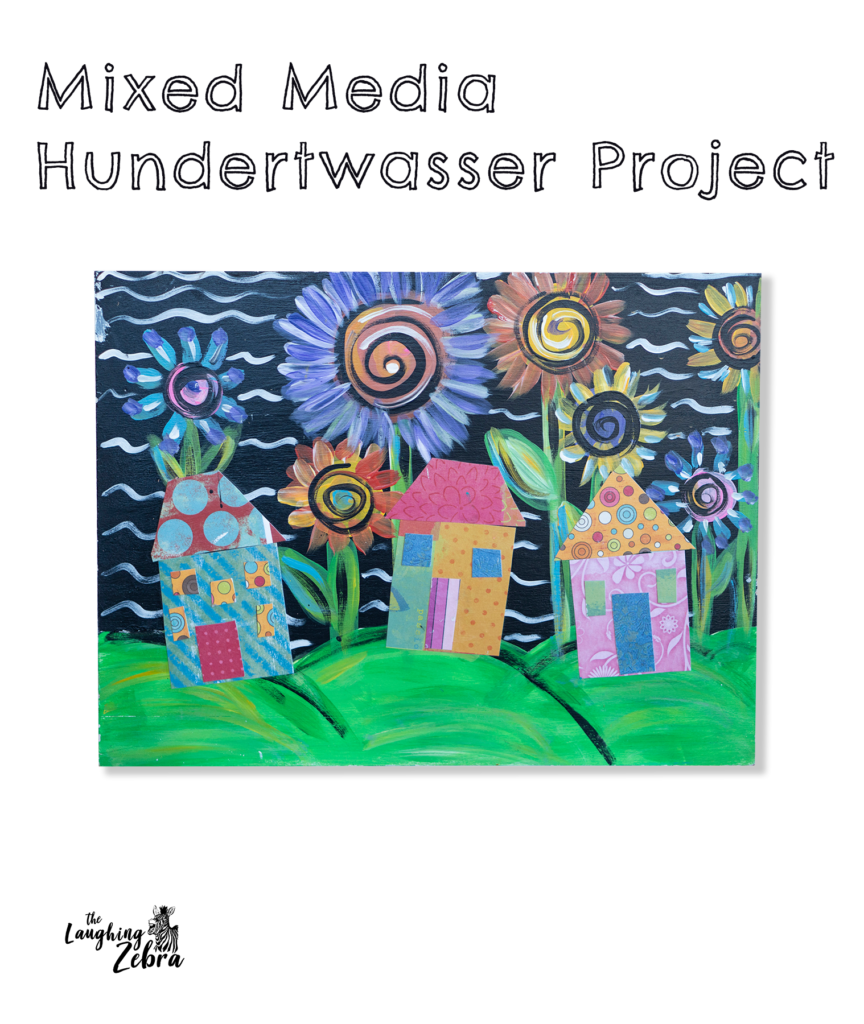

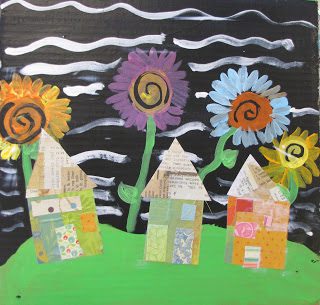
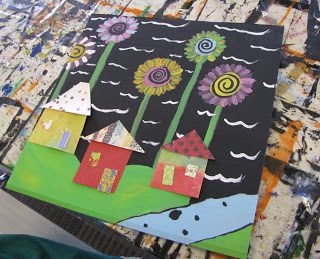
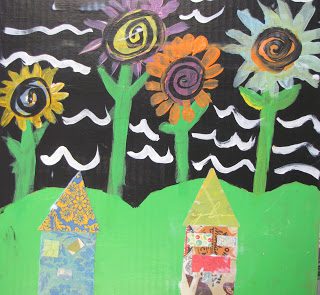
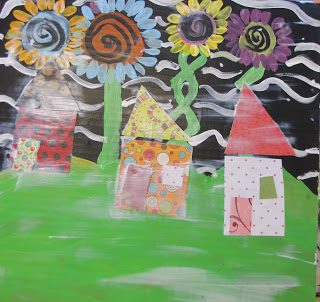
I was inspired by the banner on the art blog Painted Paper Art (great lessons, check this blog out) for this Hundertwasser lesson. I love projects with lots of color and mixed media. I have done this three different ways in the last two weeks. The samples from this 5th-6th grade class that are shown below are done on heavy cardboard, with acrylic paint, and the cut paper houses are decoupaged on. I have also done it on black poster board, with acrylic paint and just gluing the houses on, not using the mod podge. And with my preschoolers, we used chalk pastel on black poster board, and also just glued the houses on.
Hundertwasser is a fun artist to introduce to kids-they really relate to his colorful style and playful ideas. He designed houses, did paintings, created postage stamps and banners, and shared his concern for the environment thru posters. Next week I am going to have my 7th-12th grade students do a poster in his style conveying a message that is important to them.
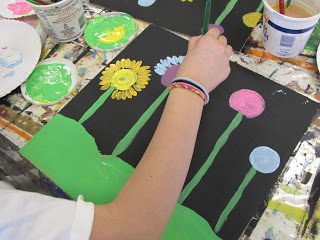
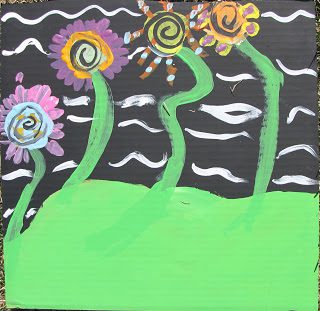
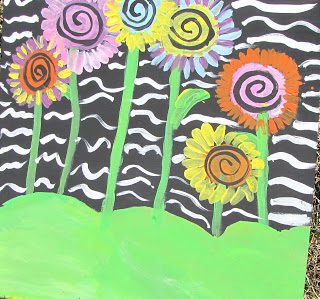
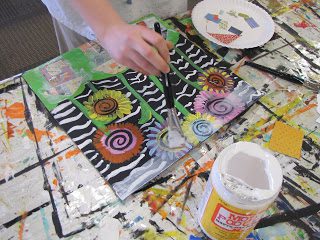
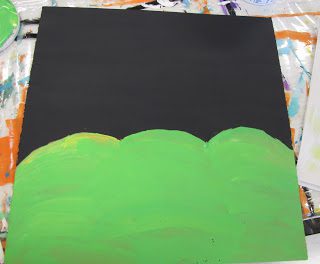
After sharing the book Harvesting Dreams Hundertwasser for Kids with the students I had them draw in some simple hill shapes at the bottom of their cardboard piece. They painted the hills in green and the background in black. Then using a round brush they painted in tall flower stalks and some leaves. Using a small flat brush they topped each stem with a circle in the color of their choice. I showed them how to use the round brush to make beautiful petals for each flower, mixing and matching colors (We added white to all the colors to make them more opaque on the black background). We then did a black spiral in the center of each flower, and white wavy lines in the background using the round brush (Hundertwasser liked to use lines and spirals in his art).
While the paint was drying the kids picked out three different house shapes,roof shapes, and doors and windows (I pre-cut out a variety of different paper to save on time). When the paint was dry they decoupaged the houses on and then covered their whole painting in the mod podge to finish it off. I love how colorful and unique they all turned out.
New step by step Hundertwasser lesson in my upcoming book. Click here to see more information on my book and subscribe for book updates!
Please refer people back to this site if you use this lesson! 🙂
Hundertwasser Mixed Media Read More »
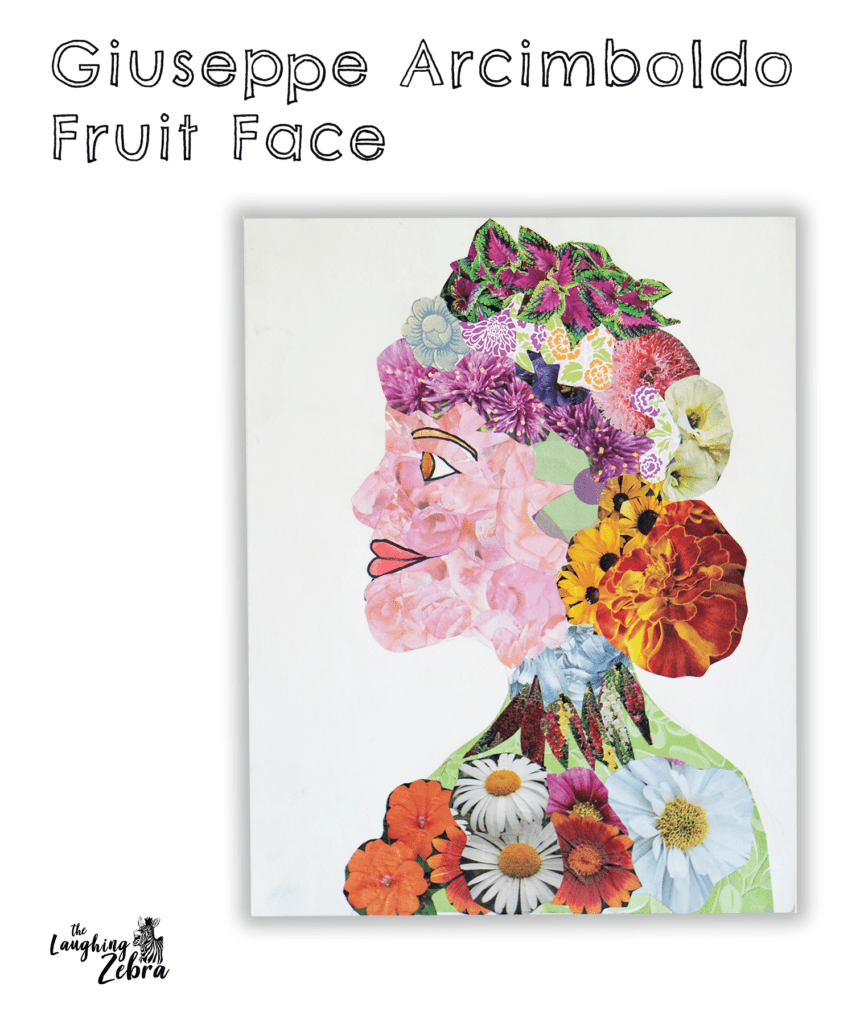
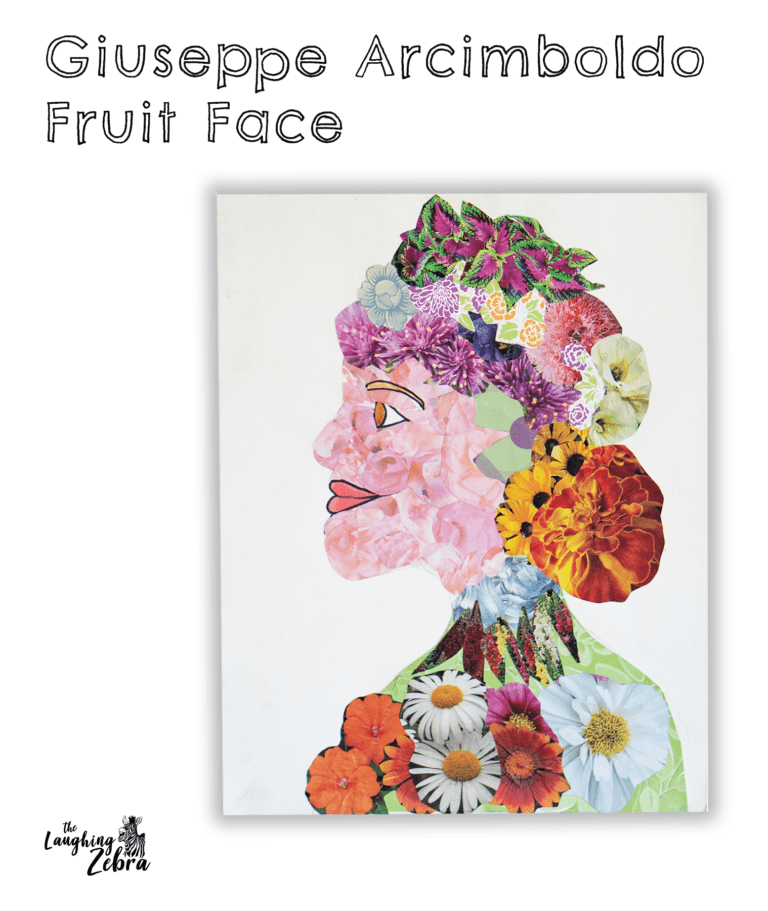
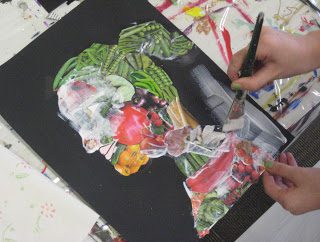
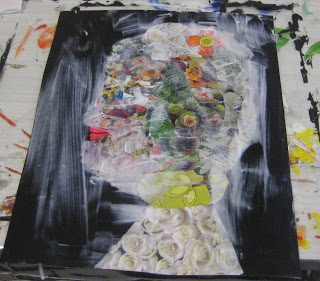
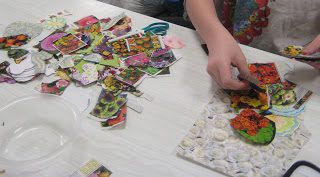
This lesson is based on the amazing art of Giuseppe Arcimboldo. If you have never seen any of his work you need to look him up. I used Arcimboldo by Taschen and Hello Fruit Face! to start off this lesson. There are lots of great photos of his art.
To have the best resources for this project, get your name on the mailing lists for some vegetable/fruit seed catalogs and some flower seed catalogs. You can also use floral scrapbooking paper clip magazine pictures, but you need a lot so I don’t recommend this. Depending on what age you are doing this lesson for you may want to pre-cut some flowers and fruits and vegetables.
I have the kids trace my pattern piece of the head onto their poster board. Then they draw in the lips, eyebrow, and eye with pencil, and paint these in with watercolors. Then I have them outline the head and facial features with sharpie.Next they paint the space around the heads with black acrylic paint (or leave this white, see last step).
Next step is to decide whether they are doing a man or woman and a fruit/vegetable face or a flower face. Then they need to choose their pictures-getting different sizes and types.
They mod podge them onto the head going around the facial features. You can either leave the heads on the same paper or have the students cut around the heads and glue, using rubber cement on a black piece of poster board.
New step by step Arcimboldo lesson in my upcoming book. Click here to see more information on my book and subscribe for book updates!
Please refer people back to this site if you use this lesson! 🙂
Giuseppe Arcimboldo Fruit Face Read More »
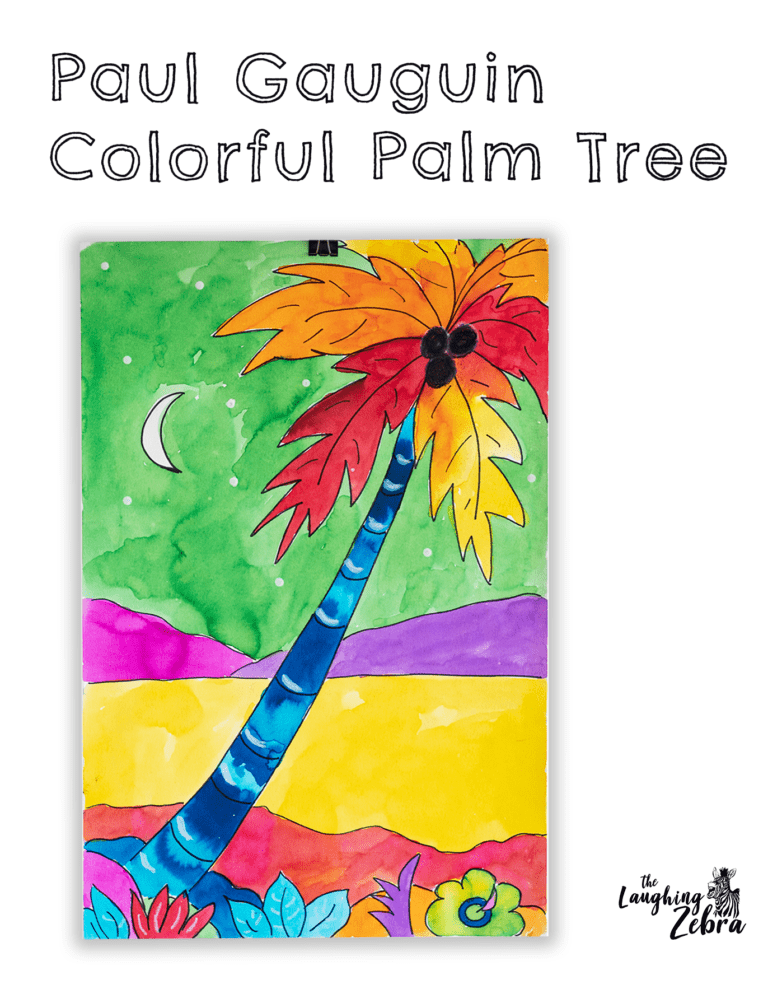
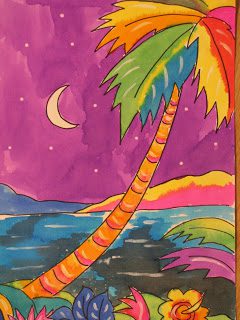
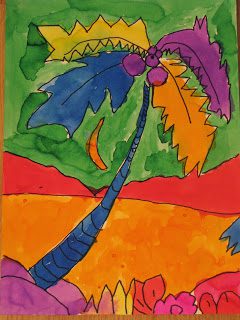
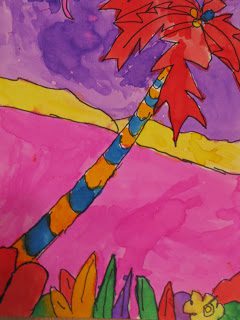
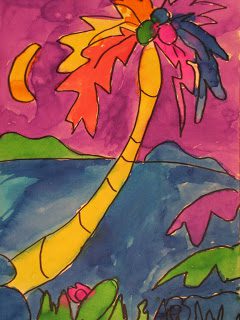
Paul Gauguin used bright flat colors in his tropical artwork and is a favorite artist of mine to teach about. I got the idea for this project from a picture I saw on the art blog Painting With a Twist. It looked like something Gauguin himself would have had fun with and I knew my students would too!
First we practiced the palm tree on a scratch piece of paper (since this was the only real difficult part of this whole picture). Once the kids had figured out how to curve the trunk and make the palm fronds we switched to an 11×15 sheet of watercolor paper and redrew the palm tree, then added the background details step by step. I let them fill in the bottom of the picture with their own plants and foliage. Then we outlined everything with Sharpie, and the fun began! The only rule with the paint was to try and paint things as differently from real life as they could. To use their “imagination” like Gauguin did when he painted his pictures. We used vibrant Sargeant brand liquid watercolors. I did this with kindergarten to 6th graders and they all turned out great. With the older kids we added white acrylic paint dots with the end of the paint brush for stars. Below are a few of the kindergarten to 1st grade finished projects. I got busy and didn’t take any pictures of the older kids’ projects.
New step by step Gauguin lesson in my upcoming book. Click here to see more information on my book and subscribe for book updates!
Please refer people back to this site if you use this lesson! 🙂
Paul Gauguin Colorful Palm Tree Read More »

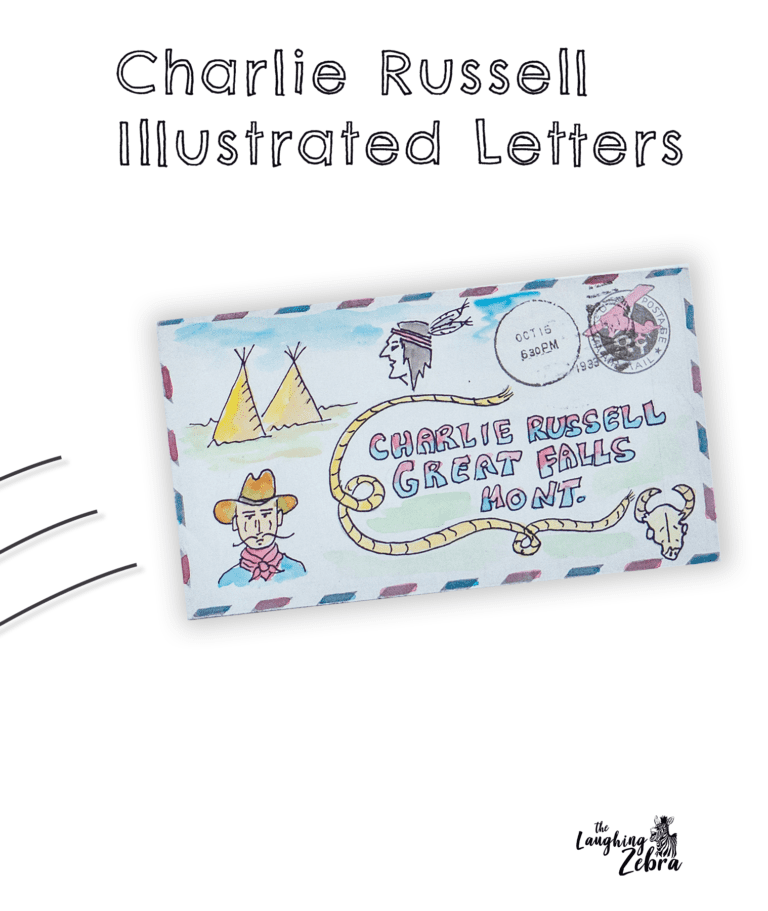
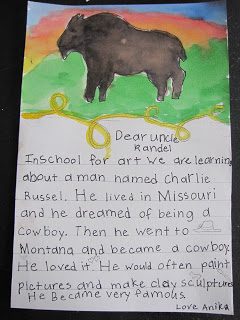
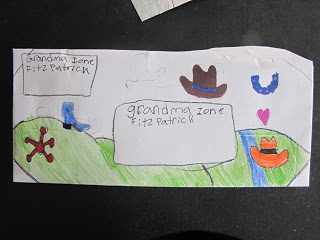
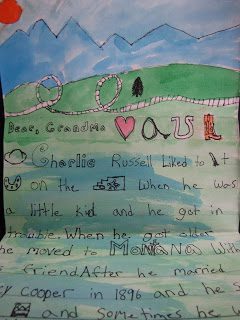
This is the third project I did with my 3rd-6th grade class on Charlie Russell. After watching some youtube videos on Charlie Russell and talking about his life and art, I had the kids illustrate a letter telling someone about him (like he often did when corresponding with friends), using soft watercolors and Western images. They turned out great and the kids really enjoyed this lesson. They decorated the envelopes as well with colored pencils and we mailed them for the final step.
First they did a rough draft on a scratch piece of paper, and then did a final draft on a piece of watercolor paper cut down to a letter size. They drew in some guidelines in pencil to help keep their writing straight. We used a extra fine line Sharpie for outlining the pictures and the writing.
*See my step by step instructions, supply list, and more photos in my upcoming book (click here for more information).
Please refer people back to this site if you use this lesson! 🙂
Charlie Russell Illustrated Letters Read More »

Fun and easy Charles Demuth art project! I did this with a bunch of different ages and they all turned out great.
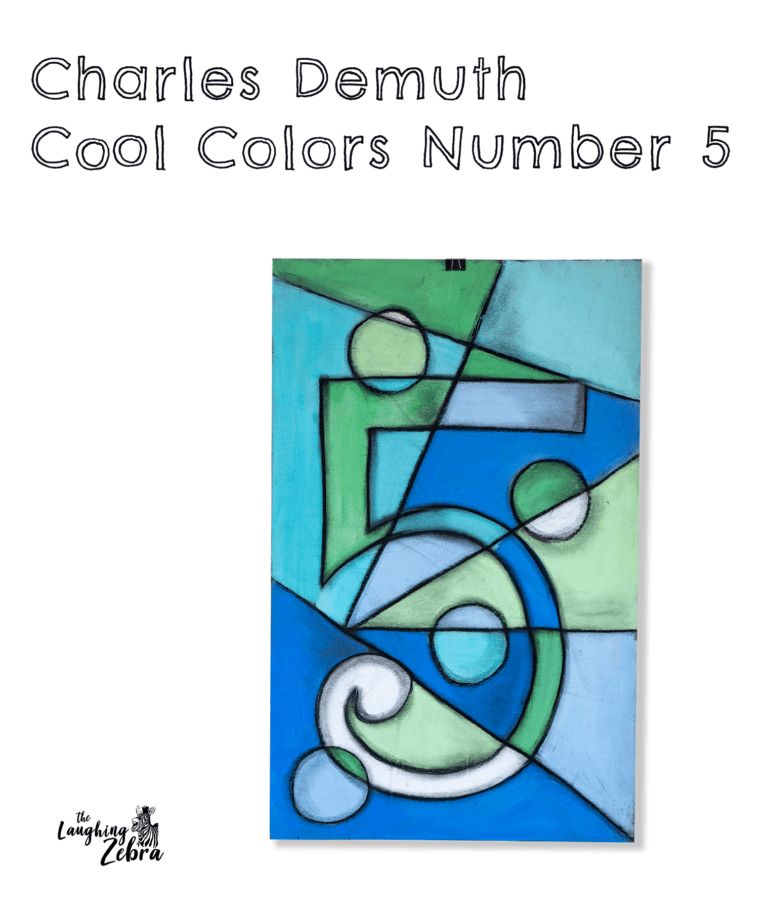
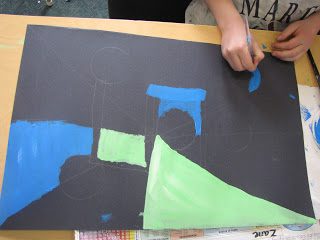
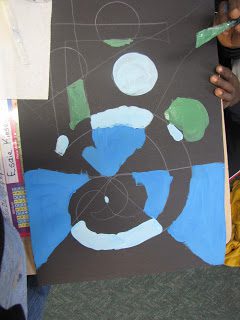
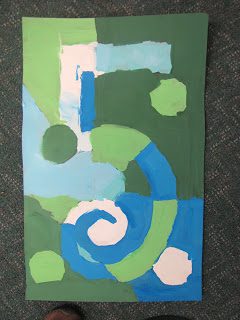
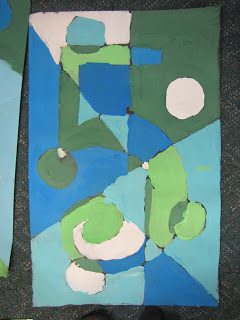
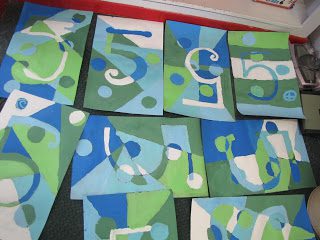
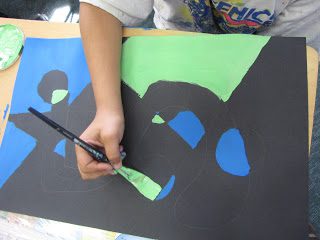
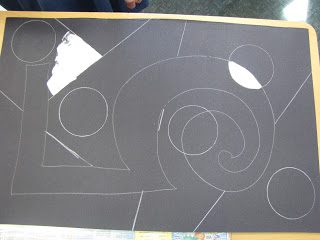
I’ve been buried in art classes and prep work and haven’t had time to sit and blog a lesson lately. This is one I did two weeks ago at one of the schools I work at. I have been captivated by this print by Charles Demuth for a long time, because I love the use of numbers and text in art. There are many lessons you could do based on this print — I came up with this one because I had just finished another project using black paper and cool colors and it turned out great (It was a portrait of Medusa). So, I thought why not the number 5?
I did this project with grades K-5. For the Kindergartners I drew the number 5 on the poster board before class using the white pencil. The kids used a plastic cup to trace on 5 circles anywhere they wanted, and a ruler to draw 5 lines. For the older kids I let them do their own number 5. Prior to the start of class I had mixed up some blues and greens with white (to make them more opaque and bright on the black background). The kids used these colors to fill in all the spaces they had made on their posters, being careful not to put the same color next to itself. This was not as easy as it sounds. They were challenged as they got farther along in their painting. For the Kindergartners I used some black paint to outline to re-discover their shapes and their number 5.
For the older kids we outlined with black chalk pastels and then went over it with a finger to smudge and add some shading in certain areas.
Please refer people back to this site if you use this lesson! 🙂
Charles Demuth Cool Colors Number Five Art Project Read More »
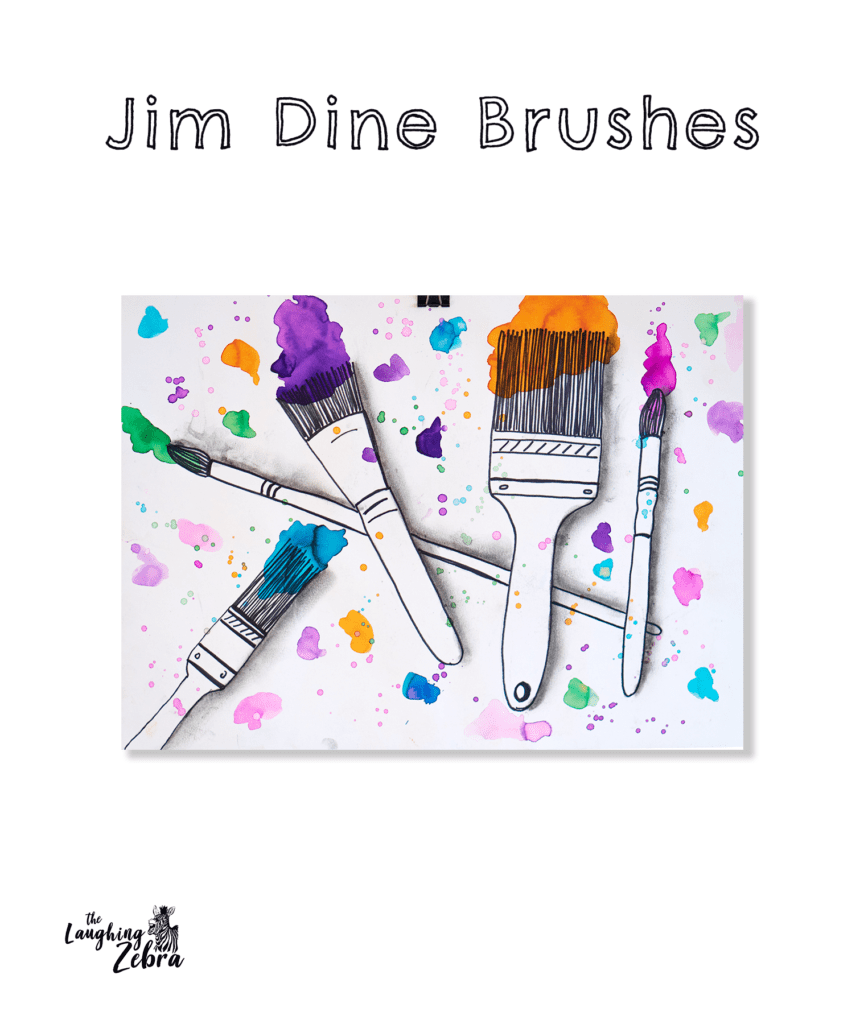

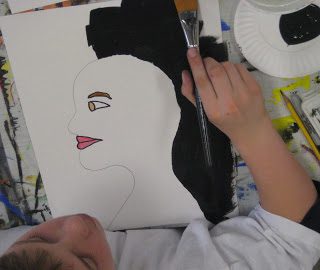
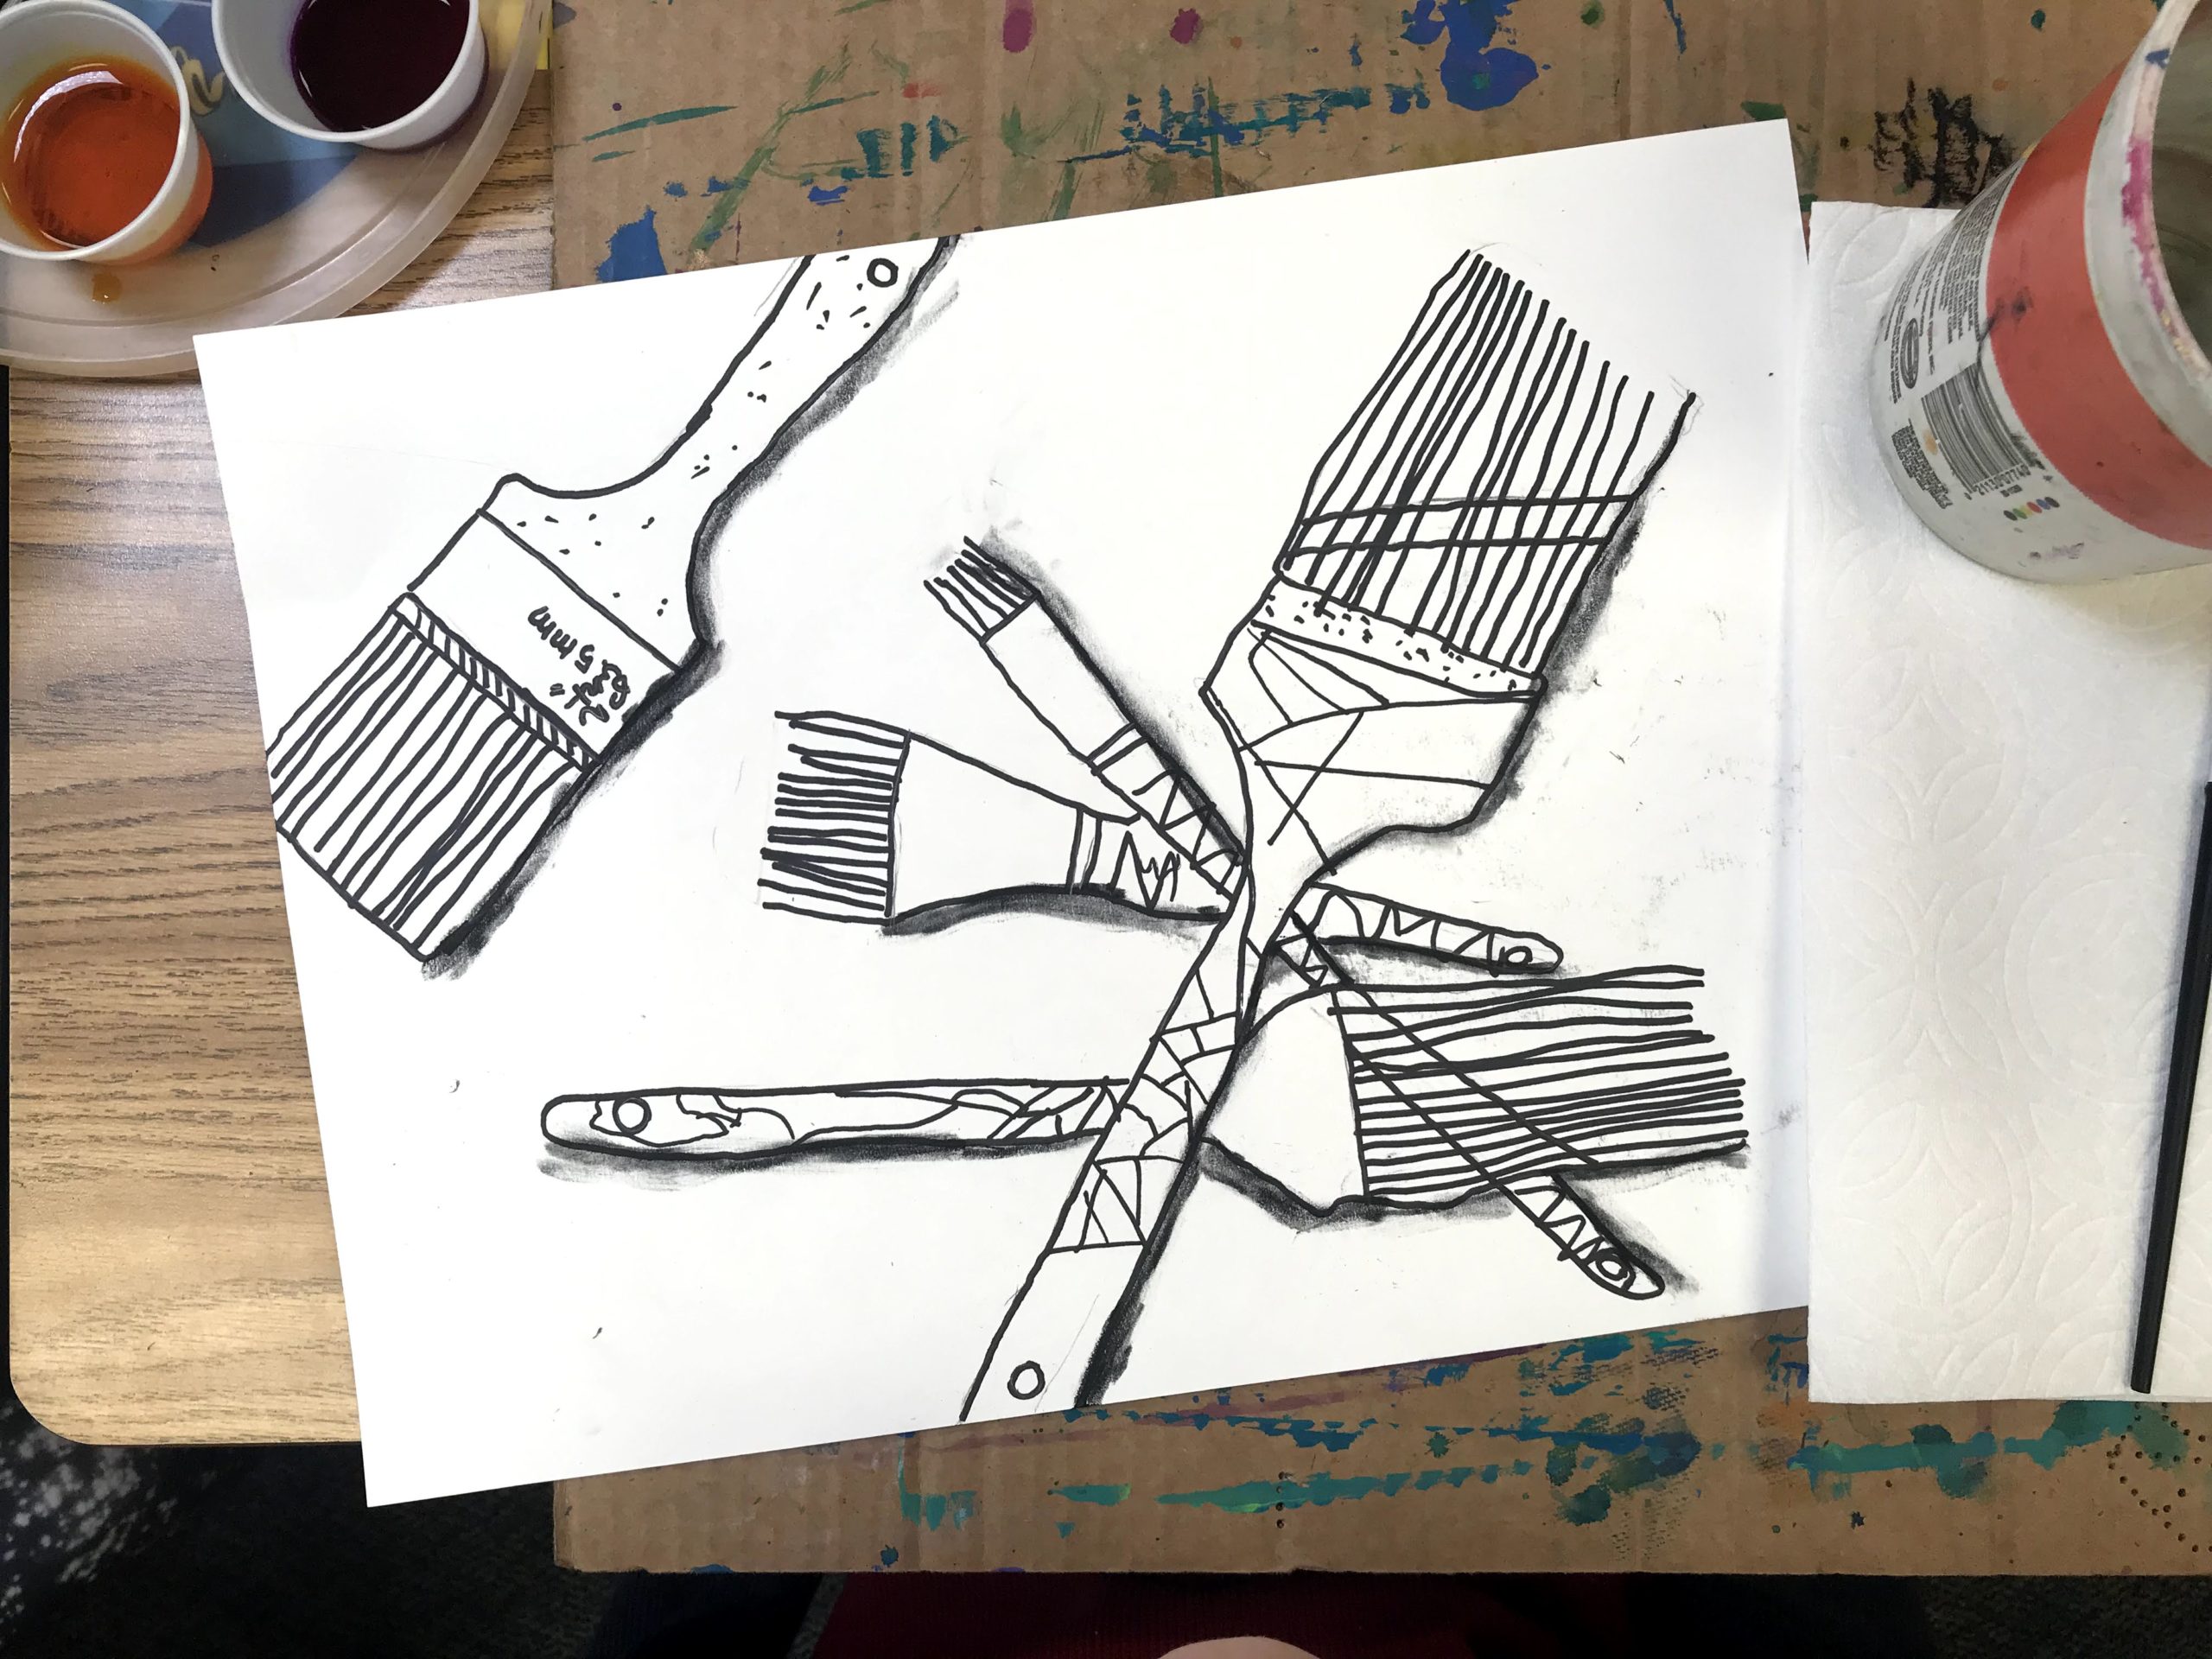
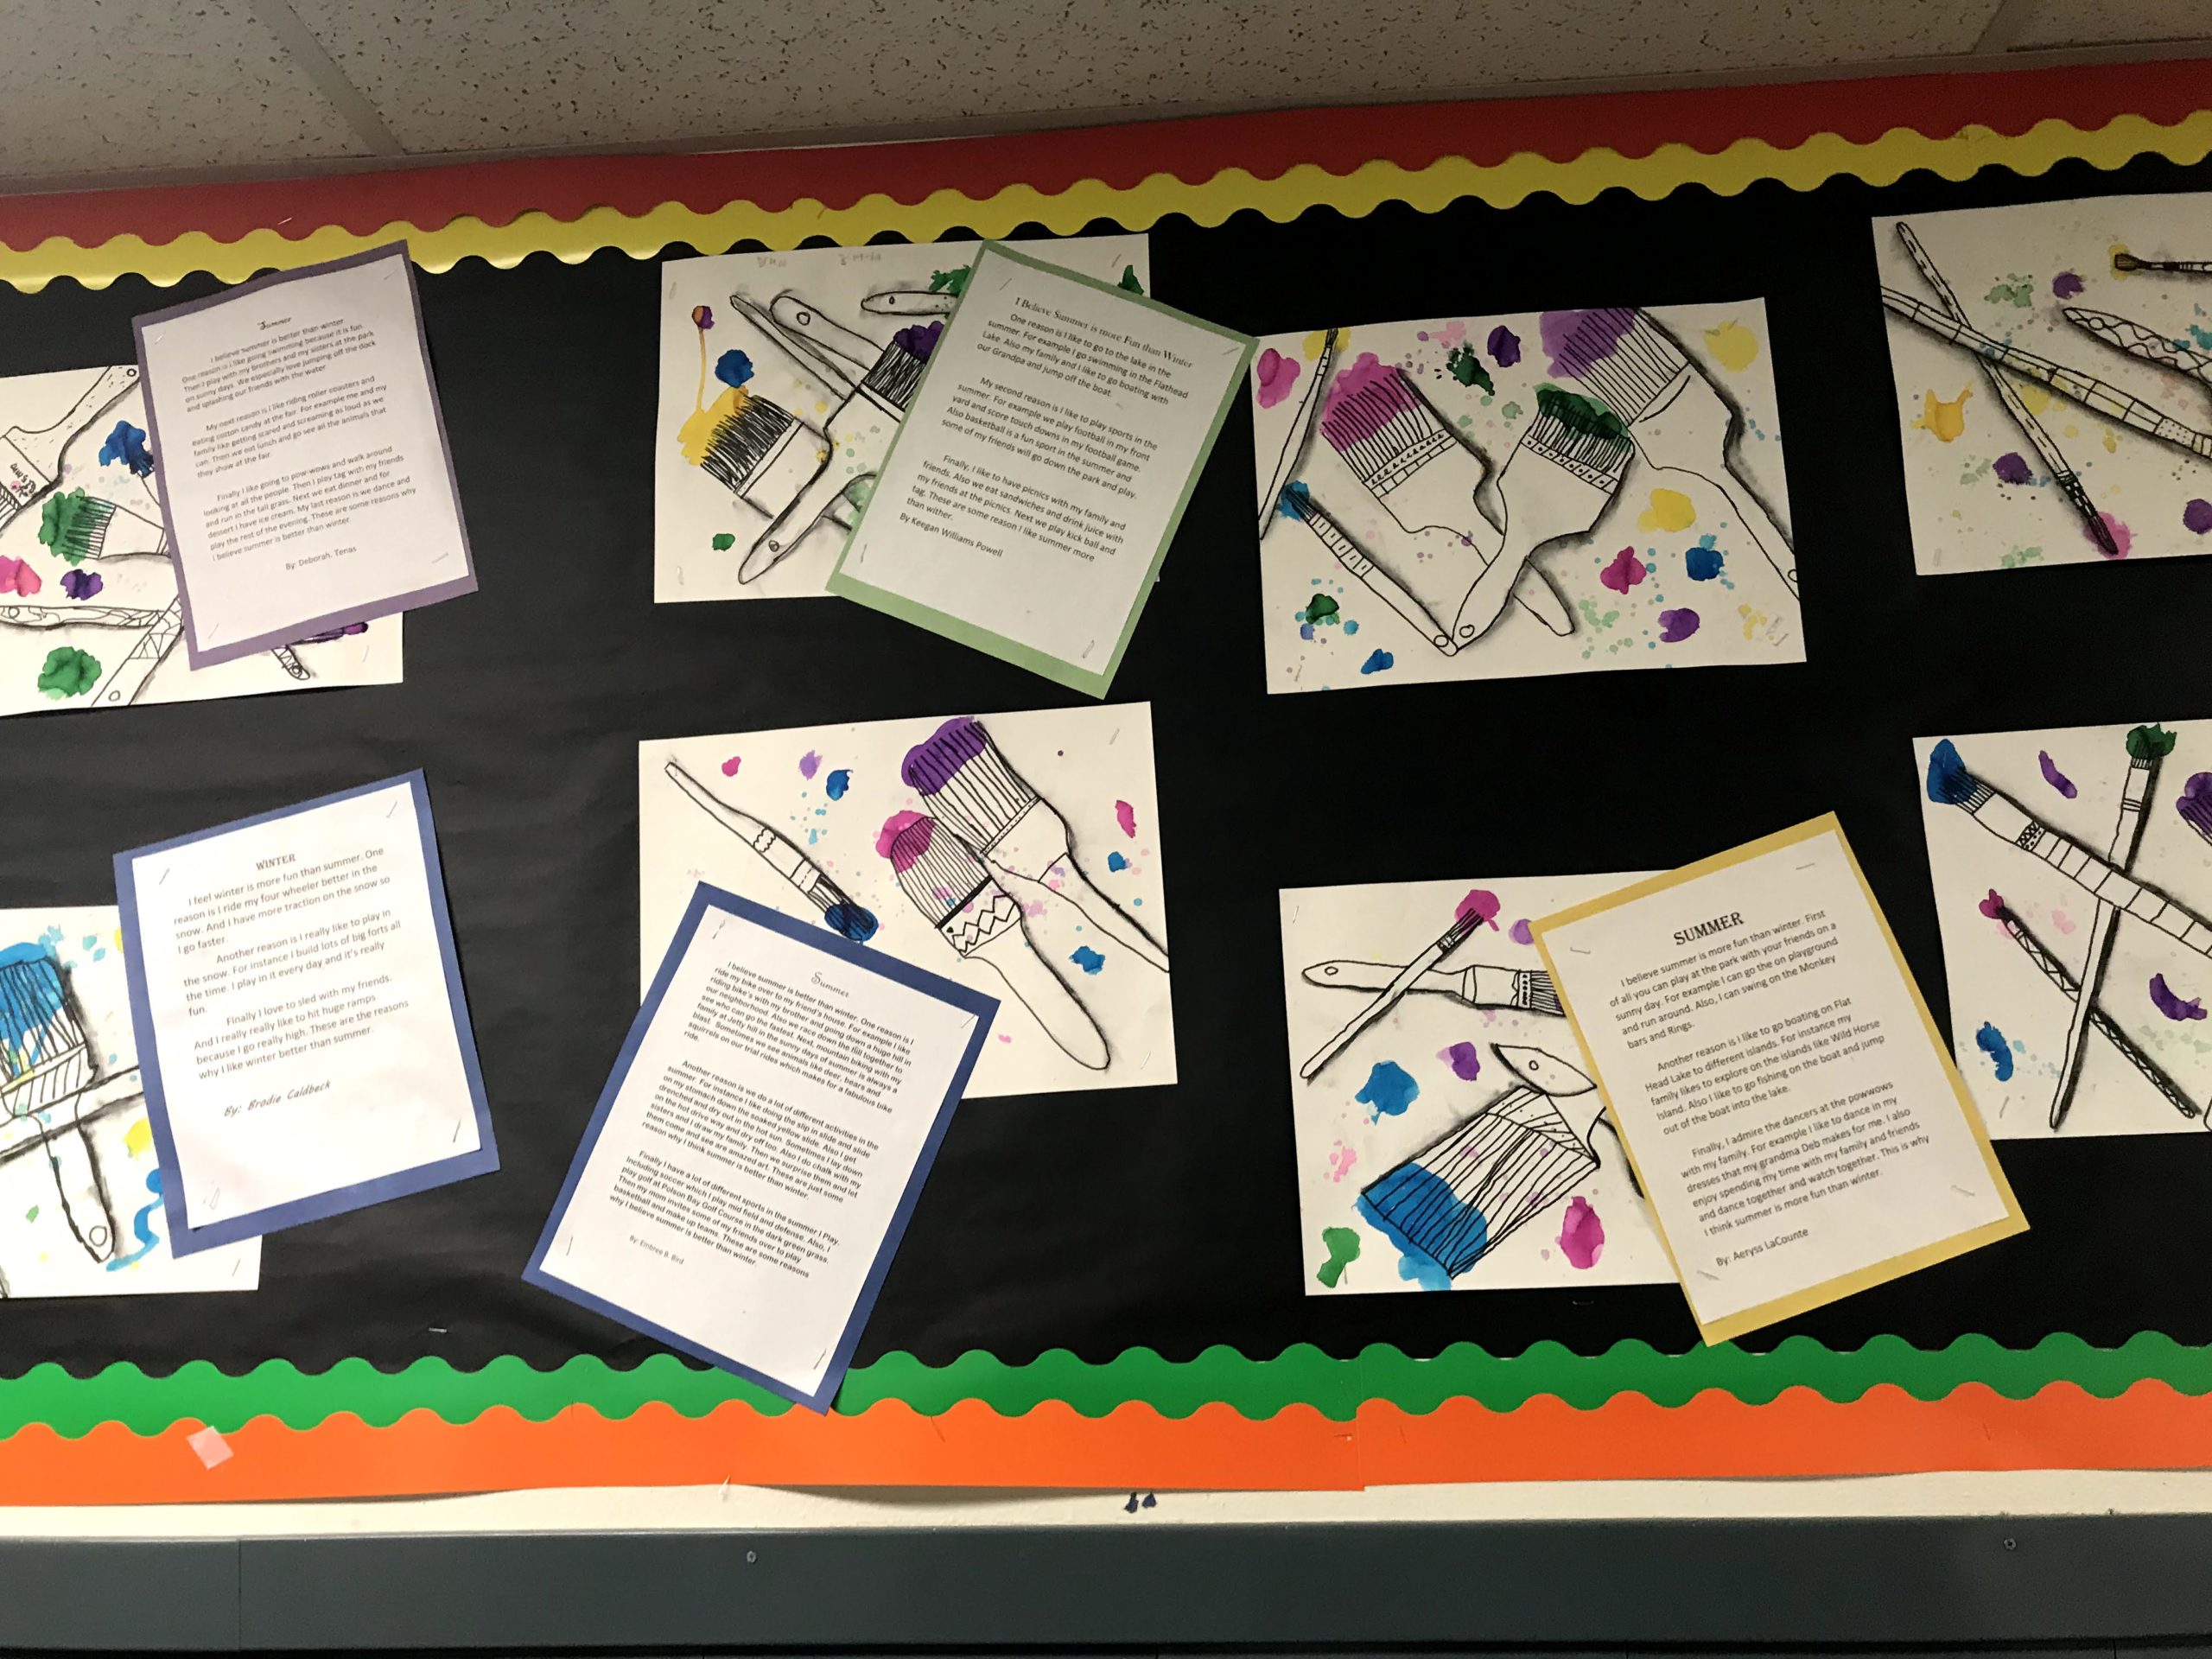
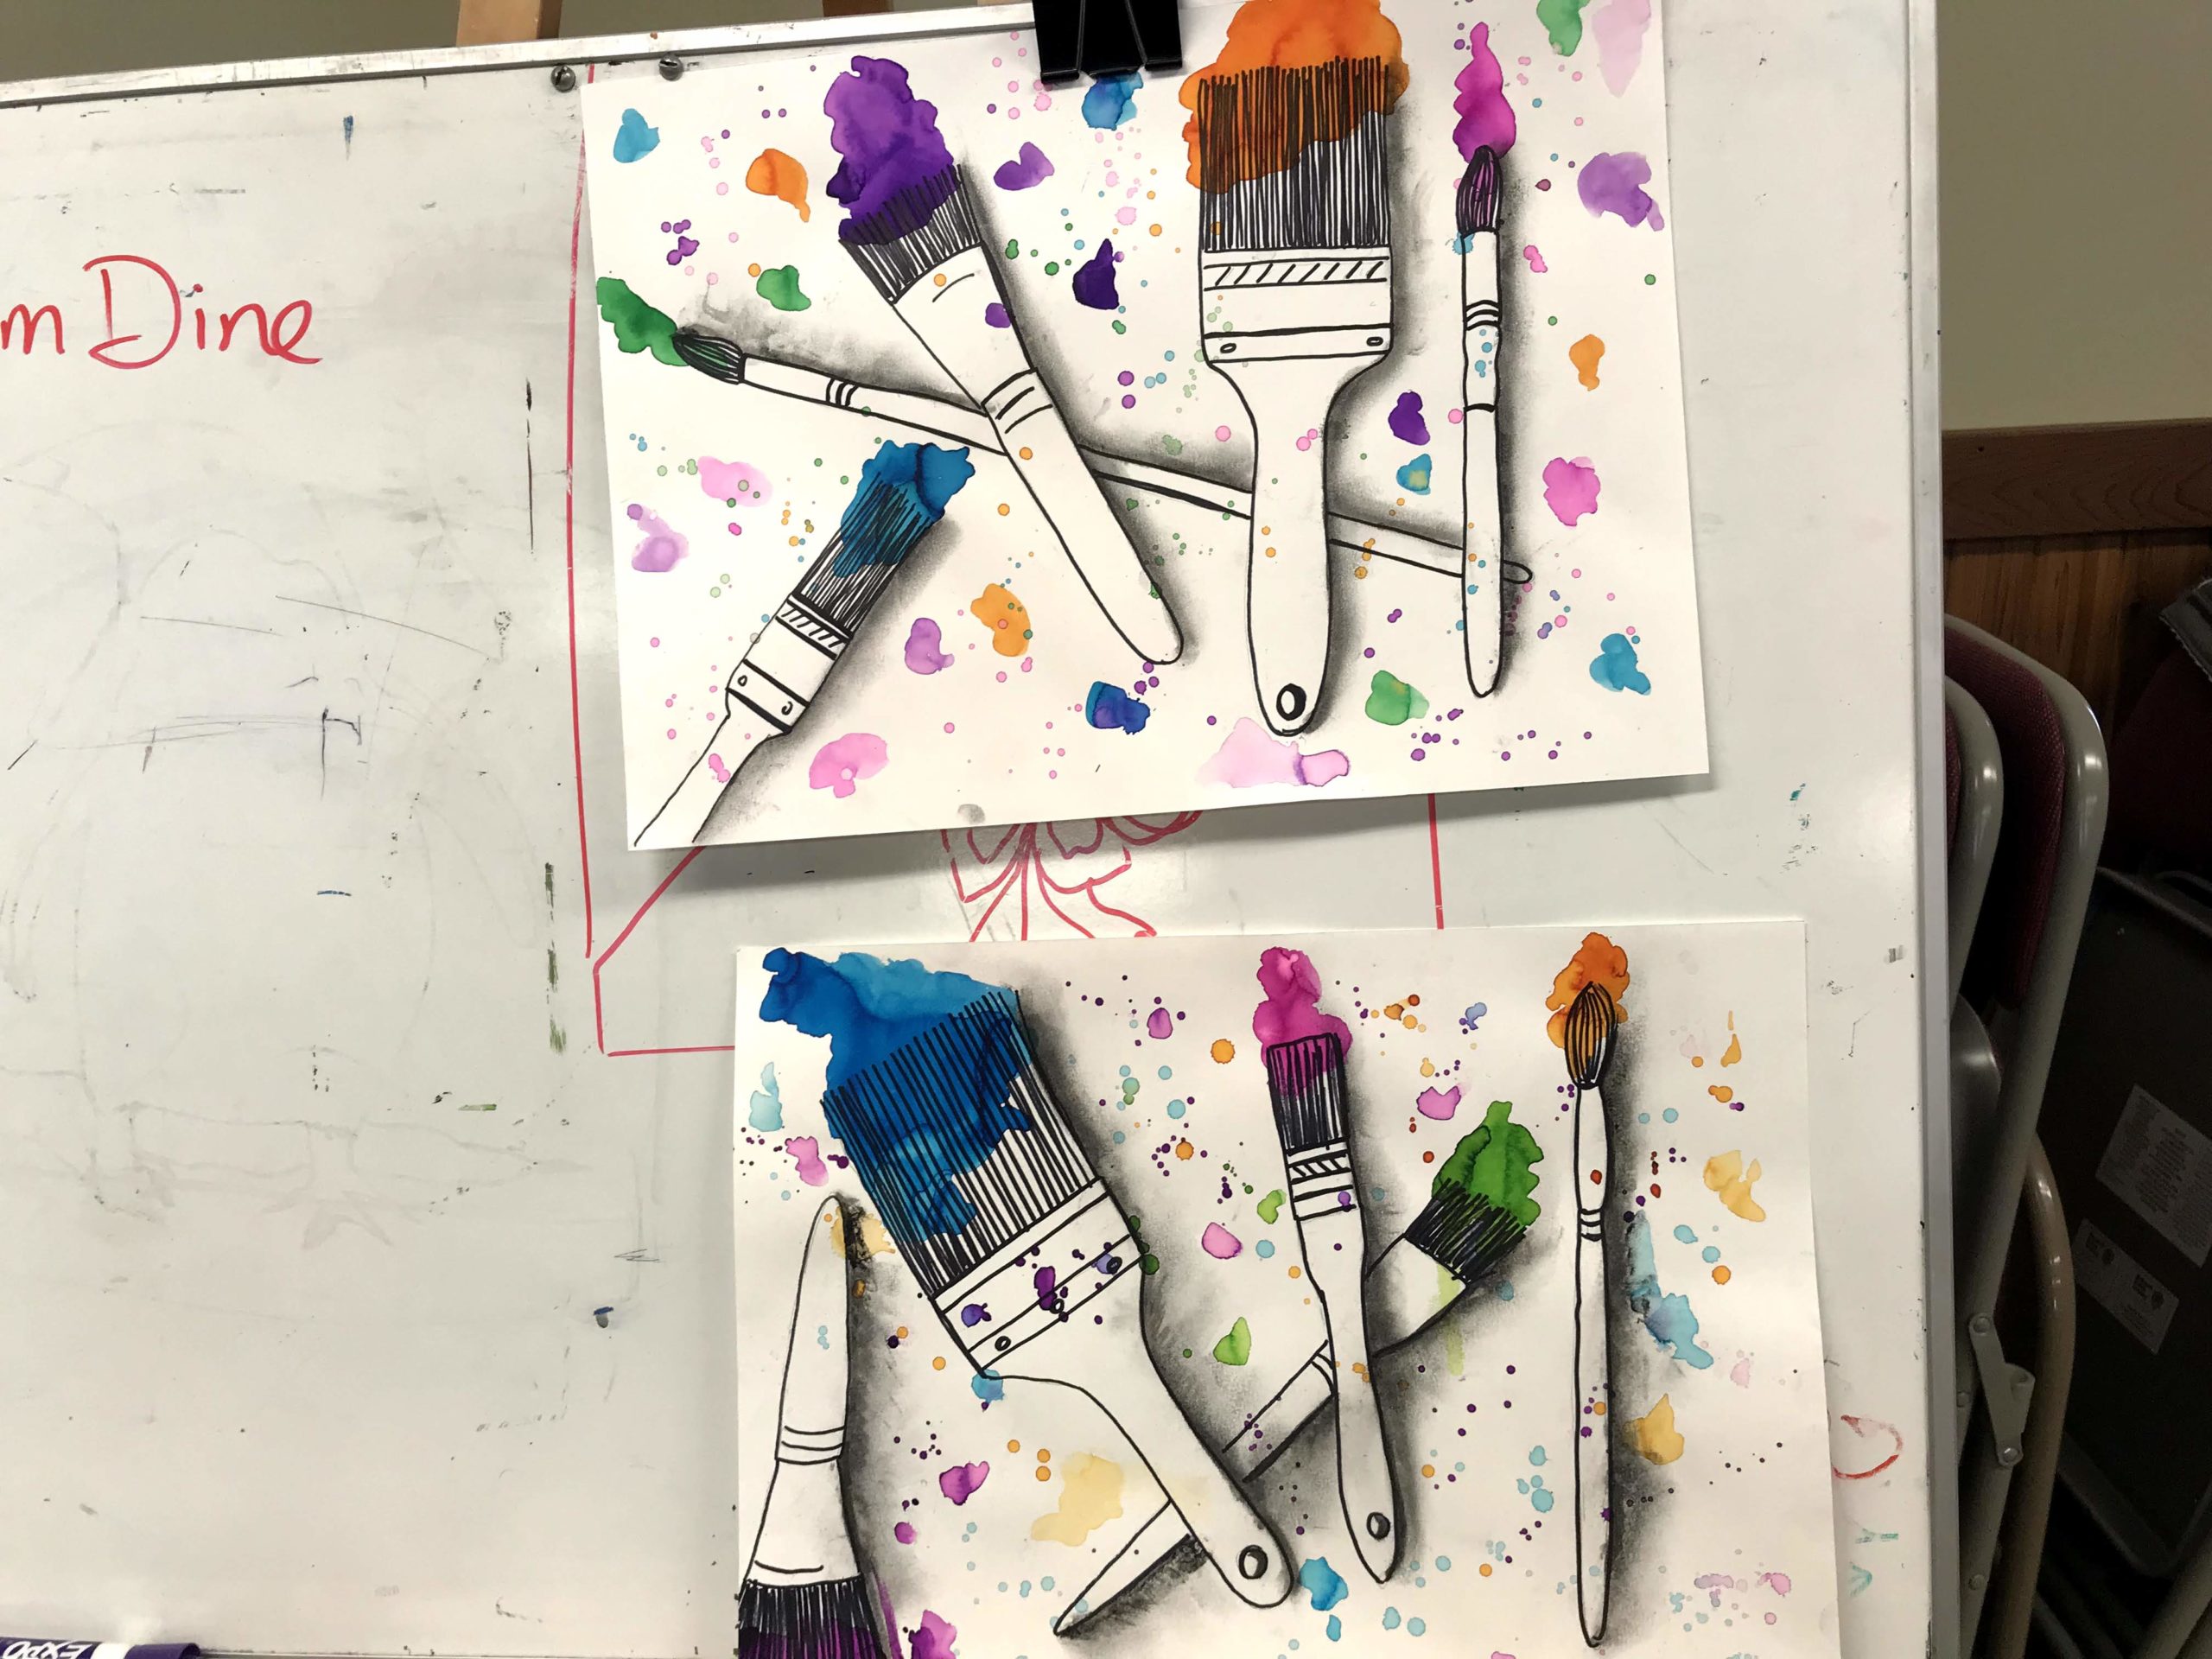
I found this lesson on https://www.instagram.com/p/BmBwCtmH3e7/ when searching around for something besides a heart project to do for Jim Dine. It is a great lesson that kids of all ages seem to love. The charcoal shading is a touch of magic as well as the puddles of color.
Have students trace around the brush they are sharing with the student sitting next to them and free hand in the details (then the other student will do the same).
Continue moving the brushes around the tables until each student has traced 5 different paint brushes (they can lay them out however they want but I would suggest the 2nd grade do them all one direction and no overlapping). After they trace the outside they will free hand in the details (caution them to do this slowly and carefully and to really observe the details on the brushes).
As the students are waiting for a new brush to get to them they can begin carefully going over the brush drawings they already have with Sharpie, being careful to erase lines where the brushes overlap before they Sharpie. Complete with all 5 brushes, then have students erase pencil lines.
Talk to them about the charcoal vines and carefully demonstrate how to hold them and to press gently with them (they are very fragile and will break easily).
Using the charcoal have them slowly draw a thick line touching the right side of each brush, making sure to not draw over the top of a brush. Move around the computer paper to act as a shield for their fingers as they are doing the charcoal part.
Then have them gently smudge the charcoal pulling the charcoal away from the brush. Have them wipe their fingers often on a paper towel so as not to get charcoal fingerprints all over their paper.
Distribute the liquid watercolors and have them put one color on each brush tip, being careful to keep the paint on the brush bristles only. They should use the watercolor undiluted and put a “puddle” down then add some water if need to spread it. This is done by plopping the paint and patting the brush to the paper to make it look like a blob of paint. They should not “paint” the color on or they will not get the rounded edges of the paint puddle.
After they paint a color on a brush bristle, they will take that same color and add some water to their brush and paint some smaller puddles of paint in 3 or 4 places on their papers.
Repeat this process with all 5 colors.
Then with water on their brush they will add a little paint and very gently tap their brush over the picture to create dots. 2 or 3 taps for each color (make sure they don’t overdue this or there will be a mess).
When paint is completely dry quickly spray a light coating of workable fixative to “set” the charcoal.
*New Jim Dine step by step lessons, supply lists, and photos in my upcoming book (click here for more information).
Please refer people back to this site if you use this lesson! 🙂
Jim Dine Brush Project Read More »